Using a Keil MDK Project with J-Link
In order to use J-Link with Keil µvision, install the SEGGER software & documentation pack first. Please verify that your J-Link software is up to date. In the following, a short step-by-step tutorial how to configure a Keil MDK project to get up and running with J-Link is given.
- Open the project to configure
- Select Project | Options for Target ... from the main menu
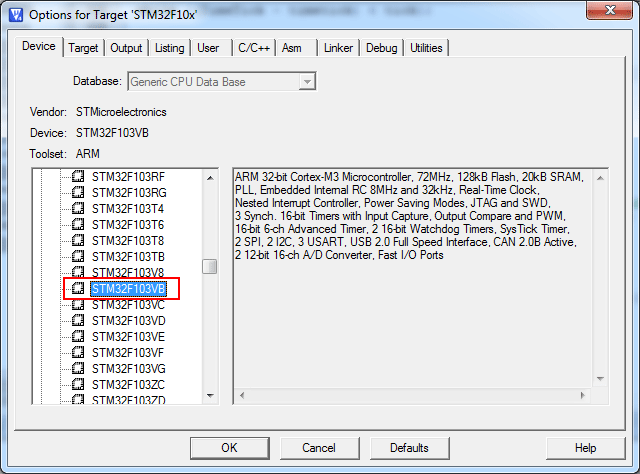
- Click the "Device" tab and select the proper device
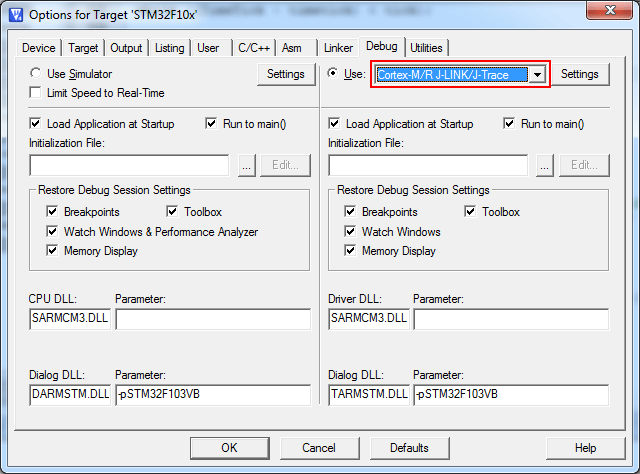
- Click on the Debug tab and make sure that Cortex-M/R J-LINK / J-Trace is selected
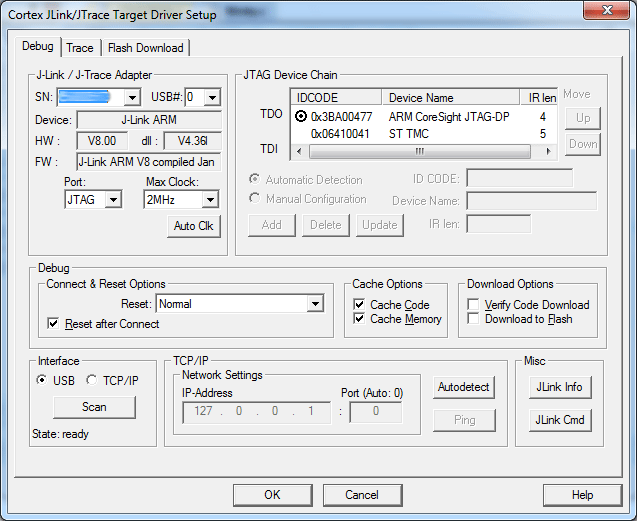
- In order to modify J-Link specific settings click the Settings button in the debug menu and a new dialog will show up:
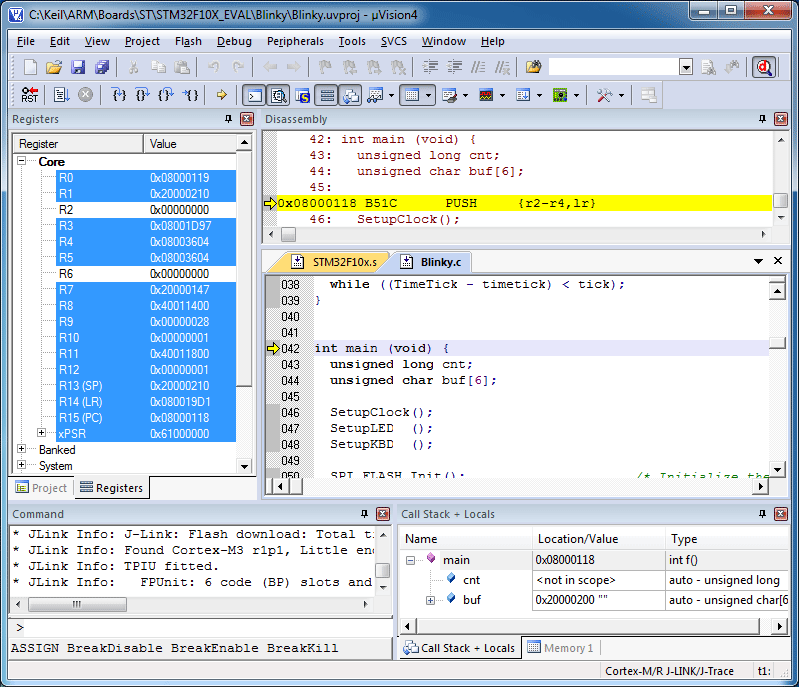
- Now the project is ready to be debugged with J-Link / J-Trace.
Using J-Link Built-In Flash Loader
First, choose the right device in the project settings if not already done:
- Click Project | Options for Target from the main menu
- Switch to the Device tab
- Select the appropriate device, for example STM32F207IG
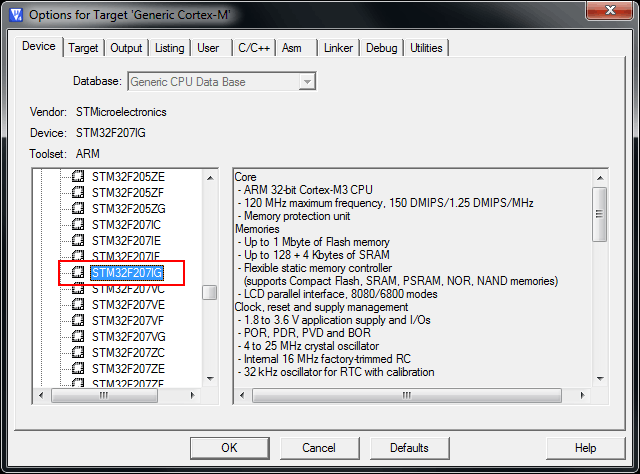
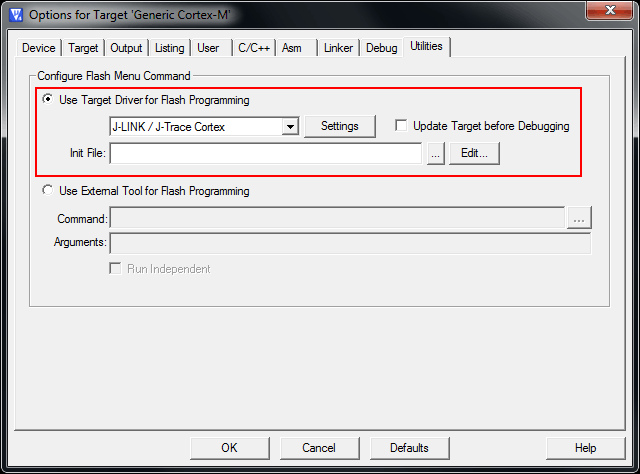
Second, enable SEGGER flash loader:
- Click Project | Options for Target from the main menu
- Switch to the Utilities tab
- Check Use Target Driver for Flash Programming
- Select J-LINK / J-Trace Cortex in order to use the J-Link built-in flashloader
Third, configure flash loader:
- Click Project | Options for Target from the main menu
- Switch to the Debug tab
- Select J-LINK / J-Trace Cortex
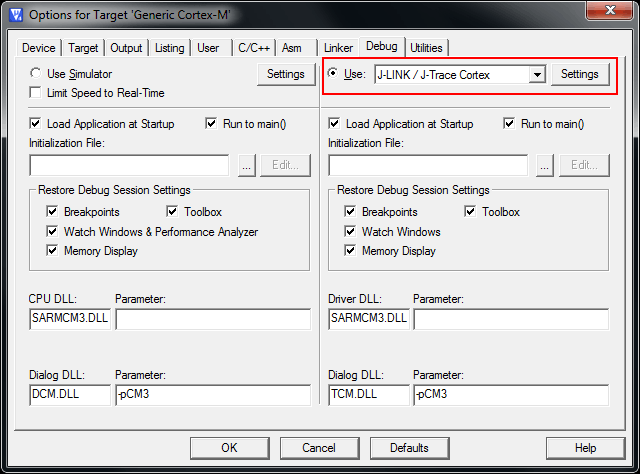
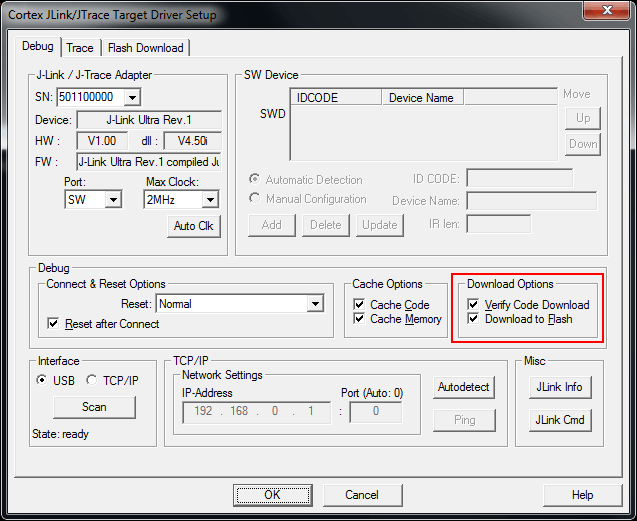
- Click Settings
- Check Verify Code Download and Download to Flash as shown in the screenshot below
Solving Known Problems
MDK V5.18 or earlier
- Problem: When using ETM trace functionality with J-Trace for Cortex-M, status bar in uVision showed "Trace: No synchronization".
- Problem: When using ETM trace functionality with J-Trace PRO for Cortex-M, sometimes the error "Failed to read trace data" appeared.
- Problem: When using ETM trace functionality with J-Trace PRO for Cortex-M, uVision sometimes crashed when large amounts of trace data were read.
Solution: Copy this version (V2.99.20) of the JL2CM3.dll to $MDK_INST_DIR$\ARM\Segger.
MDK V4.60 or earlier
- Problem: Some SW-DP Ids of Cortex-M0+ devices were not recognized correctly, resulting in an error message when trying to start a debug session. For example the NXP Kinetis L-series devices showed this problem.
Solution: Copy this version (V2.74) of the JL2CM3.dll to $MDK_INST_DIR$\ARM\Segger.
첫등록 : 2019년 10월1일
최종수정 :
본 글 단축주소 : https://igotit.tistory.com/
'임베디드.일렉트로닉스' 카테고리의 다른 글
| SES. 프로젝트에 포함된 파일 경로 변경하기 . *.emProject 파일 직접 수정 (0) | 2019.10.02 |
|---|---|
| KEIL. 문제해결. J-link 버전 낮아서 MCU 지원 못하고 다운로드 오류생기고... (0) | 2019.10.02 |
| KEIL. nRF_DeviceFamilyPack Install (0) | 2019.10.01 |
| SES. 기초 지식들 (0) | 2019.09.30 |
| USB to UART 변환 모듈. ( 장착 칩 CP2102 ) (0) | 2019.09.30 |


댓글